


Hardware Swirl Marks: Managing Micro‑Scratches Without Over‑Polishing
Check out our Hermès collection and Birkin bags!
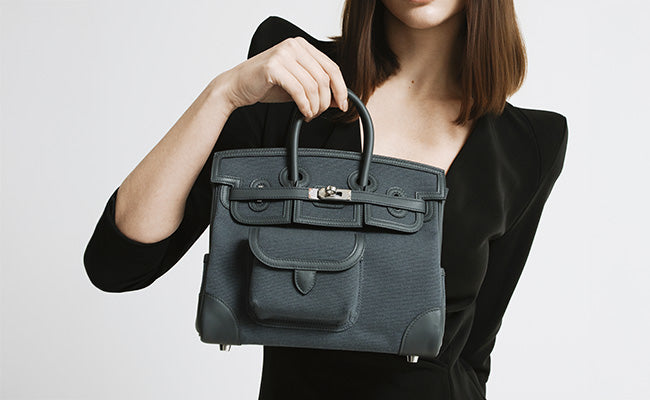
Swirl marks on luxury hardware can turn a pristine Hermès bag or high-end timepiece into something that just looks tired.
These micro-scratches show up as fine circular patterns, catching light at weird angles and making surfaces that should shine look kind of dull and, well, disappointing.
The trick to dealing with swirl marks? Use controlled polishing techniques that target imperfections but don’t eat away at the precious metal.
Over-polishing is a real danger here. It can mess with dimensions, blur engravings, and hurt both the look and the value of your favorite pieces.
Spotting fresh swirl marks on a cherished item is never fun. Still, with the right approach and a bit of knowledge about metals, most micro-scratches can be tackled without sacrificing the original finish or the craftsmanship that makes luxury hardware so special.
Key Takeaways
- Swirl marks are micro-scratches that call for gentle, controlled polishing. No shortcuts, no brute force
- Over-polishing can mess up dimensions and value, so picking the right technique is everything
- Good finishing and protective treatments help keep surfaces looking fresh and fend off future scratches
Understanding Swirl Marks And Micro-Scratches
Swirl marks and micro-scratches are the sworn enemies of flawless hardware. They show up as spider-web patterns, scattering light and dulling that glossy finish we all love. They’re not the same as holograms or buffer trails. Each has its own quirks and needs a different fix.
What Are Swirl Marks And Micro-Scratches?
Swirl marks are basically tiny scratches that hang out in the protective coating layer of hardware. You’ll see them as circular or spiral patterns, especially when you catch your Hermès buckle in bright sunlight.
These marks are super shallow. Just a few micrometres deep. You won’t feel them with your fingernail, which sets them apart from deeper gouges that go past the protective coating.
They usually look like:
- Fine, webby lines
- Spirals or circles
- Only visible under bright light
- Smooth to the touch
- Stuck in the protective coating
Micro-scratches form when something gritty gets trapped between your cleaning cloth and the hardware. Wiping a dusty surface with a dry cloth? Same deal. Scratches city.
The upside? Since these marks live in the protective coating, you can deal with them gently. No need for heavy-handed fixes that could damage the metal underneath.
How Swirl Marks Differ From Holograms
Holograms and buffer trails are different beasts. Swirl marks look random and circular, while holograms create rainbow-like effects that move with the light.
Quick comparison:
| Swirl Marks | Holograms |
|---|---|
| Circular patterns | Rainbow effects |
| Random | Linear patterns |
| Scatter light | Refract light |
| Micro-scratches | Heat damage |
Holograms usually show up after polishing with too much heat or the wrong pad speed. They create those weird prismatic effects that change color as you move.
Buffer trails are straight lines that follow the path of the polishing tool. A sign of sloppy technique or a dirty pad.
Knowing the difference matters. Holograms need a totally different approach than swirl marks, sometimes even a full refinishing instead of just a light polish.
Why Swirl Patterns Appear On Hardware
Swirl patterns pop up because of the way we handle and clean our luxury pieces. That circular motion everyone uses when wiping? It’s the main culprit.
Dust acts like mini sandpaper when it gets stuck between your cloth and the hardware. Even the fanciest microfiber cloth can scratch if it’s dirty.
Main causes:
- Circular wiping
- Dirty cloths
- Dry polishing
- Bad storage
Here’s the kicker: the more you try to baby your hardware, the more likely you are to cause swirl marks if you’re not careful. Using a dirty cloth or pressing down too hard just guarantees more scratches.
Environment plays a big role, too. Dust, pollen, and other tiny junk settle on hardware between cleanings, setting the stage for micro-scratches the next time you wipe things down.
Primary Causes Of Swirl Marks On High-End Hardware
Knowing what causes micro-scratches helps you protect your investment pieces. Most of the time, it comes down to cleaning mistakes, using the wrong tools, or letting environmental grime build up.
Improper Cleaning Techniques
We’ve all done it. Grabbed whatever cloth is nearby to quickly shine up some hardware. Usually, that just makes things worse.
Circular wiping leaves tiny scratches that catch the light and show up as swirls, especially on gold-tone hardware.
Dirty microfiber towels drag grit across the surface, leaving random new scratches with every swipe.
Dry cleaning is another big mistake. Without some kind of lubrication, even soft cloths will grind debris into the metal.
Pressure matters, too. If you press too hard, you just drive particles deeper and end up with scratches that need pro help to fix.
Cross-contamination is sneaky. Using the same cloth for leather and hardware spreads oils and dirt, which can etch the metal.
Polishing Tools And Pad Selection
DIY polishing often backfires. We see it all the time. Someone tries to restore luxury hardware and ends up making it worse.
Polishing pads made for cars are usually too rough for delicate hardware. They strip away too much and leave new scratches.
Foam applicators without proper backing don’t spread pressure evenly, so you get uneven results and fresh micro-scratches right next to the ones you’re trying to fix.
Electric polishers can get hot enough to discolor or warp thin platings. Sudden temperature changes can even crack protective coatings.
Using the wrong polish is like using liquid sandpaper. Abrasive compounds meant for heavy-duty jobs will wreck fine finishes.
Not cleaning between polish grades? That’s a recipe for disaster. Coarse grit left over from earlier stages will scratch up the surface all over again.
Surface Contaminants And Environmental Damage
The environment is always working against your hardware. Everyday wear brings in contaminants that act like sandpaper on a microscopic scale.
Water spots from rain or cleaning leave behind minerals. Wiping them off can scratch the surface during your next cleaning session.
Hand oils and skin acids make sticky layers that trap dirt. Every touch moves that grime around, making things worse.
Oxidation starts as soon as some finishes hit air. This creates tiny bumps and pits that make scratches more likely.
Fibers from clothes and bags are always rubbing against hardware. Both natural and synthetic fabrics carry particles that slowly wear down the finish.
Where you store your items matters, too. Dusty closets or damp spaces speed up contamination and break down protective coatings.
Balancing Surface Correction And Over-Polishing Risks
Surface correction gets rid of defects by carefully sanding down the protective coating, but go too far and you’ll thin it out for good. Knowing how protective coating works helps you get great results without ruining the finish.
What Is Surface Correction?
Surface correction is about removing surface defects. Swirl marks, scratches, oxidation. By polishing the protective coating with finer and finer abrasives. The goal is to level the surface so it reflects light evenly and looks glossy again.
It usually takes a few steps. Start with a cutting compound for the tough stuff, move to a polish for refinement, and finish with something ultra-fine for that final pop.
Typical stages:
- Cutting: Takes off 0.5-2 microns
- Polishing: Removes 0.1-0.5 microns
- Finishing: Barely removes any material
Modern dual-action polishers help a lot. They keep heat in check and lower the risk of new defects by moving in both circles and orbits.
Professional surface correction can even bump up a bag’s resale value by 10-20%. But remember, every pass permanently removes protective coating you can’t put back.
Over-Polishing: When Enough Is Enough
Over-polishing happens when you remove too much protective coating, whether it’s all at once or over several sessions. A typical factory protective coating is 40-80 microns thick, and you shouldn’t go past about half of that.
Red flags:
- Color fade: Finish starts to look washed out
- Edge burn-through: You see primer or base on the lines
- Heat damage: Cloudy or hazy spots that won’t go away
- Texture changes: Surface feels rough or uneven
Always measure protective coating thickness before you start. Thickness gauges are your best friend here. If it’s thin, go easy or skip correction entirely.
Heavy-duty compounds can take off 2-3 microns in one go. On thin finishes, that doesn’t leave much room for mistakes or future fixes. Stick with the mildest product that gets the job done.
Protective Coating And Material Science Basics
Protective coating is made of cross-linked polymers that protect and add shine over the metal. UV rays, dirt, and wear break these chains, which is why we get swirl marks and scratches.
Things that matter:
- Hardness: Tougher coats resist scratches but are harder to polish
- Thickness: Thicker coats give you more room for correction
- Age: Older coats get brittle and are easier to damage
Single-stage finishes (no protective coating) are trickier. You risk taking off color since pigment sits right on top. Two-stage systems separate color and protection, making correction safer.
Temperature changes everything. Cold protective coating is tough to cut, but too much heat can cause lasting damage. Best to work between 15-25°C.
Different brands use different formulas. German luxury cars tend to have harder protective coatings. Tough to scratch, tough to polish. Japanese brands are usually softer, so they scratch easier but are simpler to fix.
Advanced Polishing Techniques For Micro-Scratch Management
Getting rid of micro-scratches means picking the right abrasives, matching them with the right pads, and deciding whether to use machines or go by hand. Progressively finer compounds and careful control make all the difference.
Choosing The Right Abrasives
You’ve got to match your abrasive to the scratch. For surface-level stuff, fine compounds work best. Deeper marks call for something stronger at first.
Quick guide:
- Light scratches: 2000-3000 grit
- Moderate: 1500-2000 grit
- Deep: 1000-1500 grit, then finer
The two-step method is a winner for luxury finishes: start with a cutting compound, then follow up with a finishing polish to bring back the gloss.
Micro-abrasive compounds are a game-changer. They cut carefully without stripping too much away, so you’re less likely to make new marks.
Always test on a hidden spot. What works on one finish might be too much for another, especially with high-end paints.
Types Of Polishing Pads: From Cutting To Finishing
Pads matter. Cutting pads tackle the tough stuff, while finishing pads bring the shine.
Foam cutting pads. Open-cell designs hold abrasives well and don’t get too hot. Microfiber cutting pads are more aggressive but need a steady hand.
Firmness counts. Firm pads cut better for stubborn scratches. Soft pads are for the final polish and delicate areas.
Special pad patterns like waffle or hex shapes help with heat and keep compounds from drying out, which means fewer new swirl marks.
Finishing pads (soft foam, fine cell) are what you want for that glassy, mirror finish.
It’s smart to swap pads during long jobs. Fresh pads keep things consistent and stop cross-contamination.
Machine Polishers Versus Hand Polishing
Machines make big jobs easier and keep results consistent. But for tricky spots and final details, nothing beats hand polishing.
Dual-action polishers are a sweet spot. They oscillate and spin, so you get good correction without too much heat. Rotary polishers work faster but are less forgiving.
Hand work is great for badges, trim, and tight curves. You can control pressure and avoid hitting sensitive areas.
Speed matters. Lower speeds (2-3) for finishing, moderate (4-5) for initial correction.
Cordless polishers are getting better every year. No cords to trip over and enough battery for pro-level work.
Mix it up: use machines for large areas, hands for the details.
Finishing Steps: Protecting And Enhancing Luxury Metal Surfaces
Polishing is just the start. To really protect luxury hardware, you need advanced coatings and careful application. That’s how you keep your investment pieces gleaming, without risking the delicate surface you just worked so hard to restore.
Ceramic Coating And Protective Options
Ceramic coatings really set the bar for luxury hardware protection. These molecular shields bond right to polished metal, forming an invisible layer that shrugs off fingerprints, moisture, and whatever else the environment throws at it.
Getting it right starts with obsessive surface prep. Every last trace of polishing compound has to go. If even a speck lingers, the coating just won’t stick as it should.
Some standout ceramic coating choices:
- Nano-ceramic formulas – 2-5 micron thickness
- Silica-based protective films – Self-healing, which is honestly cool
- Hybrid polymer coatings – Built for extra toughness
When you go with pro-grade ceramic coatings, they cure in about 24-48 hours and can last 2-5 years. That’s a solid return, especially compared to the hassle and cost of re-polishing high-end hardware.
Temperature isn’t just a detail here. It’s crucial. We see the best results between 18-24°C, and keeping humidity under 50% seems to help a lot.
Microfiber Towels: The Unsung Heroes
Not all microfiber towels are up to the job. The right towel can mean the difference between a flawless finish and a scratched-up mess.
What matters in a microfiber:
- 350-400 GSM weight for good absorption
- 80/20 polyester-polyamide blend to keep streaks away
- Edgeless design so you don’t get scratches from seams
We never cross-use towels. Cleaning, polishing, buffing each get their own. Mixing them just spreads around grit and polish residue.
Washing them right keeps them working longer. Cold water, skip the fabric softener, and the fibers stay grippy instead of just pushing dirt around.
Folding isn’t trivial, either. We stick with the quarter-fold. Eight clean sides per towel, which sounds a bit obsessive but really works.
Applying Sealants On Polished Hardware
Sealant application is all about timing and care. We try to get the sealant on within 30 minutes of polishing, before the air can settle dust or contaminants onto the pristine surface.
A controlled environment makes a noticeable difference. At 20-22°C, sealants spread smoothly, and you avoid streaks or weird pooling.
How we do it:
- Thin, even coats in slow, circular motions
- Wait 5-10 minutes between layers
- Buff out with a dedicated microfiber towel
Many modern sealants add UV blockers and anti-static ingredients. These help keep hardware from aging too fast and cut down on dust sticking to it.
Curing times jump around depending on the product, but we usually wait 12-24 hours before handling. It’s a pain to wait, but it really does make a difference for how long the protection lasts.
Expert Maintenance Methods To Prevent Future Swirl Marks
Keeping hardware pristine is mostly about habits and a watchful eye. Routine matters more than any miracle product.
Safe Cleaning Habits For Ultra-Luxury Hardware
A gentle, regular cleaning routine keeps micro-scratches at bay. We always start with a clay bar to pull out any embedded dirt before touching polish.
Key tools:
- Fresh microfiber cloths every time
- Dual-action polisher for safe, controlled work
- pH-neutral cleaning solutions made for luxury metals
We don’t reuse polishing pads between sections. Fresh ones stop grit from scratching surfaces.
Light pressure is the rule. Let the tools and products do their thing; pushing harder just makes more work down the line.
Two-bucket wash system:
- One bucket with cleaning solution
- One bucket for rinsing pads between passes
Pads need to stay saturated with product. That lubrication is what keeps friction and damage down on delicate finishes.
Routine Inspections And Touch-Ups
We check hardware monthly, always under good lighting. Sunlight is surprisingly unforgiving and shows every swirl.
We snap photos of any trouble spots. This helps track patterns and tweak how we handle pieces.
Inspection focus:
- Clasps for signs of wear
- Turn-locks for circular scratches
- Chains for damage at contact points
If we spot minor swirl marks, we touch them up fast with a light polish. Fixing things early means we avoid harsher restoration later.
Touch-ups get the same gentle approach as full corrections. Quick fixes keep that mirror shine alive without overdoing it.
Frequently Asked Questions
Caring for luxury hardware is all about using the right approach and products. Here’s what people usually want to know about keeping things flawless without risking the finish.
How can one gently buff out those pesky micro-scratches without dulling the luxe sheen of premium leather goods?
Ultra-fine polishing compounds made for luxury hardware work best. Always start with the gentlest option, and use small, circular motions.
A dual-action polisher on low speed keeps things cool and safe for delicate finishes. Testing on a hidden spot first never hurts.
Use the lightest touch possible. Let the product do the heavy lifting. Pushing harder usually backfires.
Is there a go-to product that aficionados trust to treat and maintain the pristine condition of their high-end accessories?
Collectors swear by polishes from reputable brands. They’re gentle but still handle micro-scratches well.
Look for pro-grade compounds with fine abrasives. Avoid anything from the cleaning closet at home. Those usually have harsh chemicals or big, scratchy particles.
Honestly, some of the best stuff is made for high-end watches, and it works wonders on bag hardware too.
What's the best technique for a touch-up on the quiet elegance of a high-gloss finish without going overboard?
Start by cleaning with a lint-free microfiber cloth. You want the surface totally free of dust or grime before you polish.
Use just a little polish, and stick with straight lines instead of circles. Work on small areas so you can control the result.
Keep the pad flat and even. Tilting or pressing too hard just adds new swirls. Kind of defeats the purpose, right?
Could you let me in on the secret to preserving that delicate, high-end surface texture from everyday wear and tear?
Honestly, prevention wins. Store pieces in dust bags, and try not to let them rub against rough stuff.
Gentle, regular cleaning with the right products stops buildup that could scratch during normal use. Clean microfiber towels are non-negotiable.
For hardware that sees a lot of action, protective films are a smart move. They’re almost invisible but add a surprising amount of defense.
How often should one indulge in the care of their treasured possessions, ensuring flawless presentation without excessive maintenance?
A quick wipe-down after each use keeps oils and dirt from building up. It takes almost no time and saves a lot of hassle later.
Only polish deeply when you actually see micro-scratches. Overdoing it just wears down the finish.
Quarterly checkups are a good rhythm. Catch problems early, and most luxury pieces only need serious attention once or twice a year if you’re careful.
Are there any bespoke remedies or tools for ensuring our cherished pieces stay runway-ready without losing their exclusive charm?
Some collectors swear by custom-cut microfibre cloths tailored to fit particular hardware. No more awkward folding or wasted fabric. It’s a bit of a flex, but honestly, it keeps cleaning efficient and precise.
For those tricky spots around engravings and in tight corners, you might want to try precision cotton swabs. Regular cotton balls? They just leave annoying fibers clinging everywhere.
A good jeweller’s loupe. Yep, those little magnifying glasses. Lets you spot what’s actually damage and what’s just surface grime. That way, you don’t end up polishing something that only needed a quick clean.